Hi everyone
Sometimes I like to try out new ways of approaching things. Milky-way shots in nice landscapes are always challenging. The 500 rule or the even more severe NPF rule makes it very difficult to have a good combination between a good illuminated landscape and sky without startrails.
The proposed shorter exposure times to avoid startrails are making it complicated to gather enough light, certainly with longer lenses like 50mm (or more). Indeed for a 50mm on a 24 Mpx full frame camera like the Sony A9 the NPF rule limits the exposure time to 5.4 sec (with a Sony A7r4, 61 Mpx it's only 3.6 sec).
But the use of star trackers ar a good solution for making this longer exposures possible. With my little tracker I can go up to 2-3 minutes in combination with the 50mm.
Star trackers became much cheaper and easier to use these days. I’m using the little “Move Shoot Move” or MSM a quit a lot and I became also the owner of a “Benro Polaris”. Until now I consider the MSM as my first choice because it’s so easy to pack and setup. Sadly, the rather low payload is sometimes a no go.
Combining the tracked images with the static foreground images for situations with flat horizon is almost no problem. But when there are trees or constructions in front of you it becomes difficult because of the smearing effects these foreground objects will cause when using a star tracker. In order to avoid this some take first the pictures for the landscape and then move after the object or further away from it and take the sky pictures. Afterwords the two are combined in Photoshop. It has become quit easy to combine these images later on with the new Photoshop tools “sky selection” and “sky replacement”.
So here I propose another approach for combining the tracked images and the static foreground images without having the need to change your position while taking the pictures. Needed are a series of tracked images and one ore more foreground pictures. Actually when examining my tracked images I could see that there are plenty parts of the sky present. But these parts disappear once the image is stacked, converted to a smart object and blended.
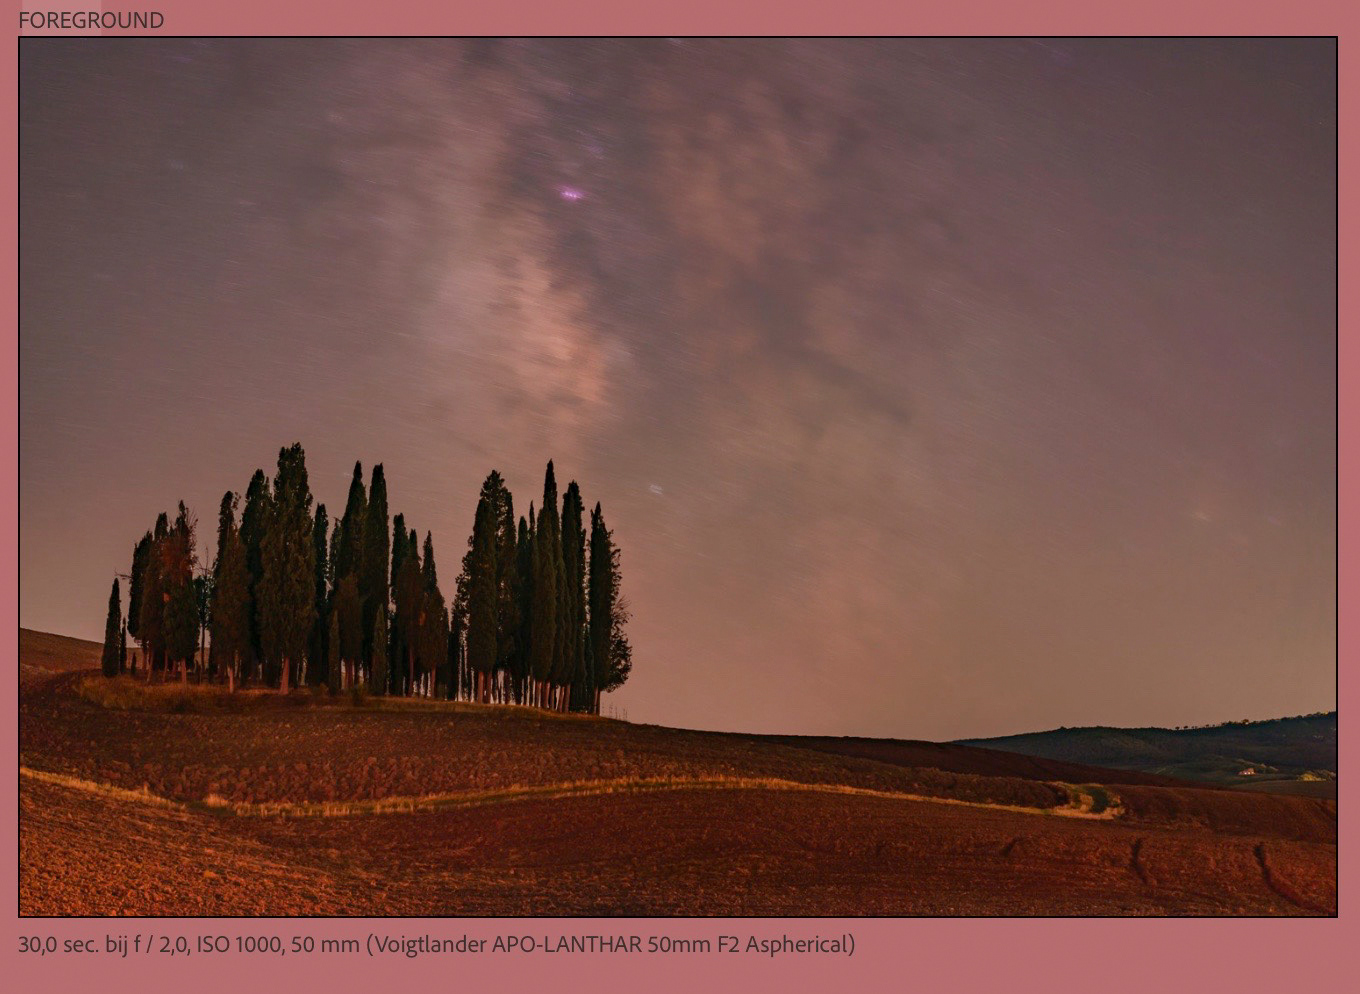
Here is an example with 30 sec tracked images taken with a Voigtlander 50mm f2.0 at f2.0 mounted on a Sony A9, ISO 1000 (why not 2 minutes…forgot my shutter release cable).
Ended up with 16 tracked images (blue) for the sky and 5 images for the foreground (green).
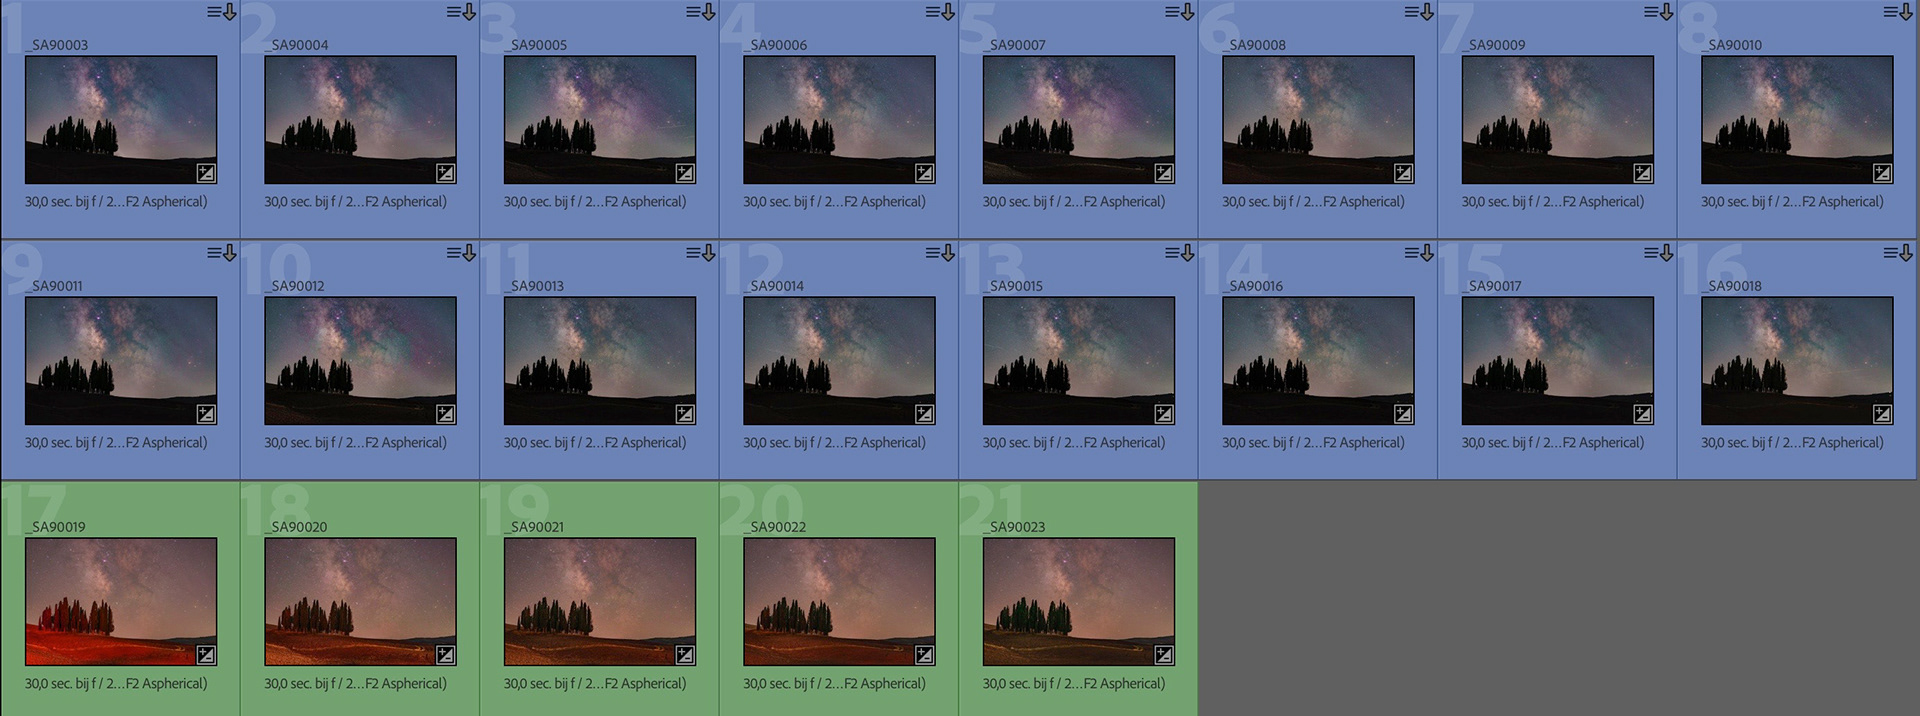
Some cars were passing by on a rather busy road what explains the different light conditions on my foreground images. Turned out it wasn’t a problem because I took 5 different images which are combined as explained later.
New approach with LR (Lightroom) and PS (Photoshop)
The goal for this new approach is to recover those parts of the sky between the trees for my final image from the tracked images.
Selected one sky-image in LR and did most of the adjustments here like contrast, color, changes for selections of the sky using masks,…). Transferred these changes to the other images with a total synchronisation (including the masks !). That’s a rather personal choice. Prefer to do this on the RAW images and do some minor corrections afterwords if necessary.
Opened all these sky images as layers in Photoshop. Once they were all opened I saved this first as “LAYERS”.
Selected all the layers > smart object > blend mode > median . Afterwords change it back to pixels and saved this image as “SKY”
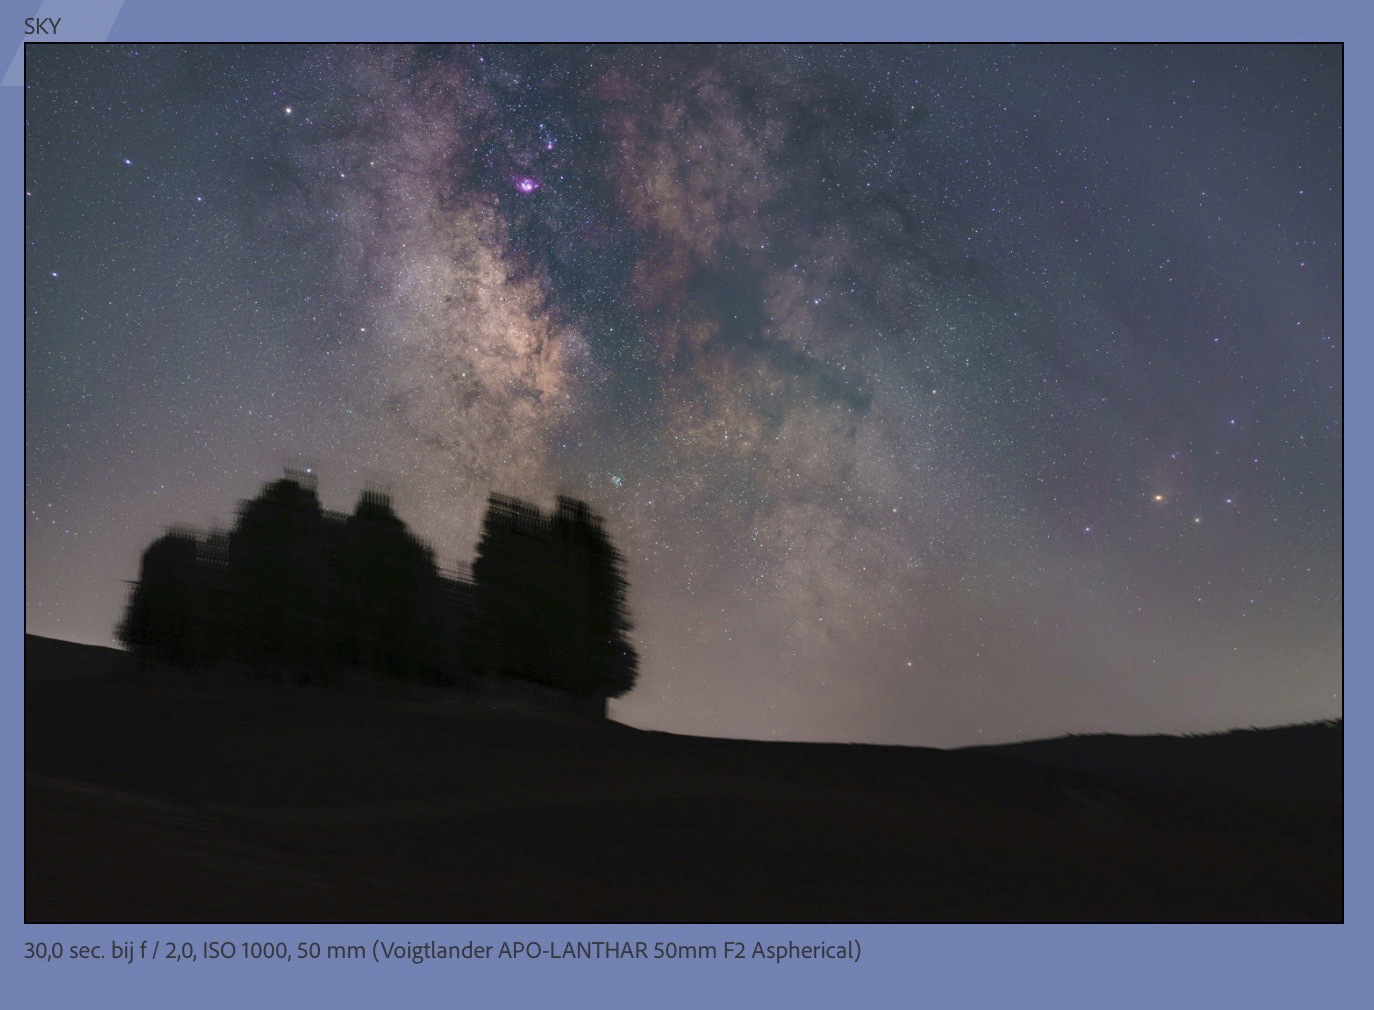
What’s obvious is that the MSM worked like it should and is perfect for the sky but the trees in the image are covering a big portion of my sky region between the trees.
Did the same for my foreground image and saved it as “FOREGROUND”. Visible is the blurred sky but sharp trees.
Selecting the FOREGROUND image and copying it above the “SKY” image would result in dark smeared areas under the trees (after masking the sky of the FOREGROUND).
Reopened my LAYERS image selected all the layers and changed them all from “normal” to “lighten” and blended the layers. Saved this as “LIGHTEN”.
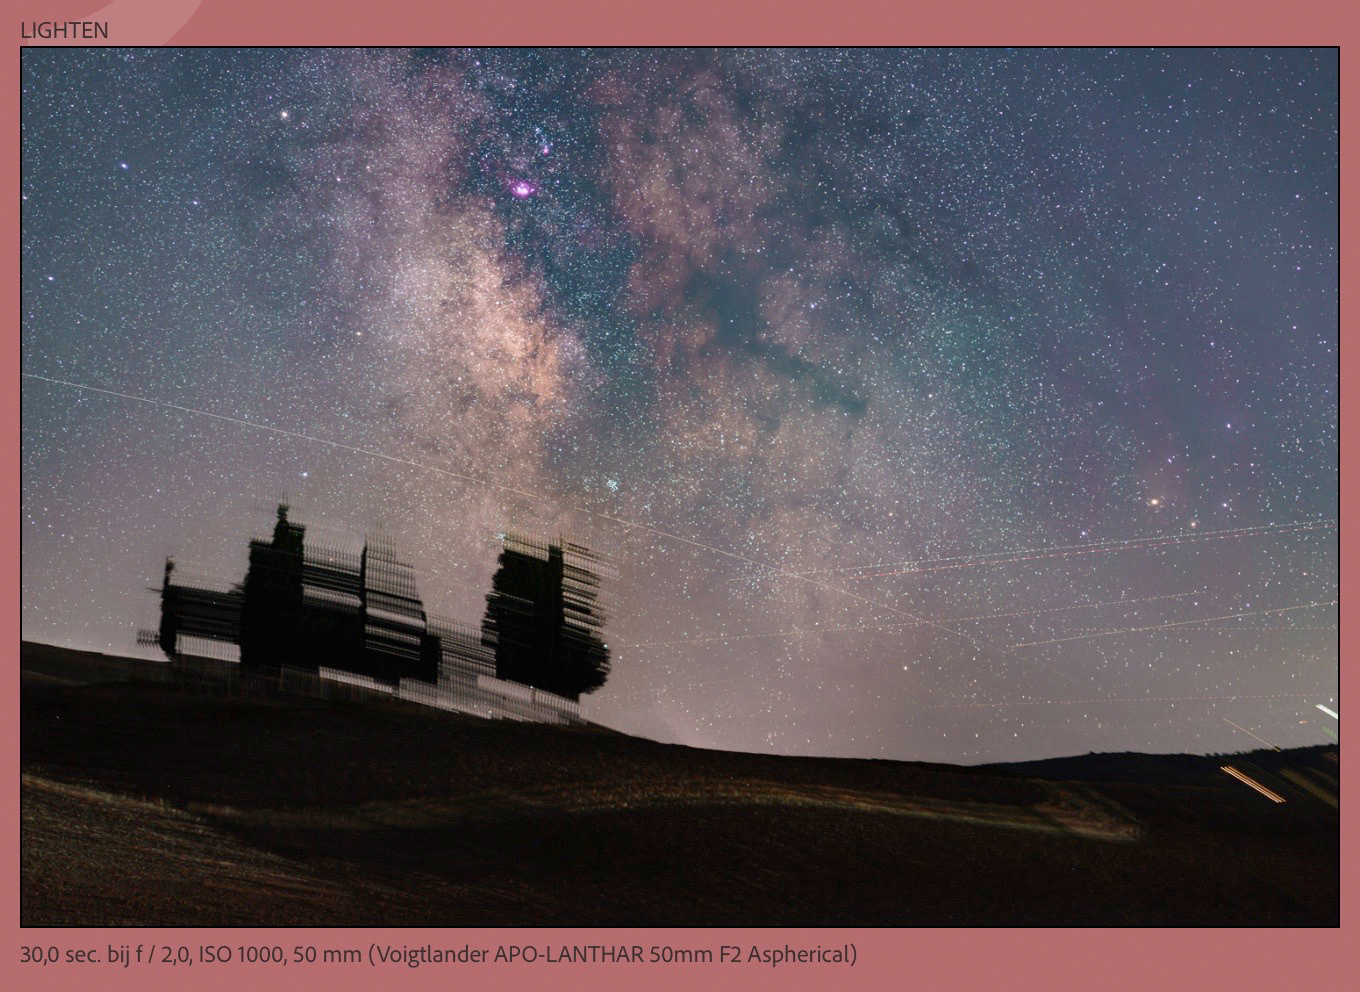
The reason why I’m not using the LICHTEN-version as is it has a more luminosity noise and a lot of problems with passing satellites, planes and background lights.
But what becomes visible right away is that less parts of the sky will cause problems when blending it with my foreground picture
So at the end of this proces I got 3 different images that I will use: SKY, LIGHTEN and FOREGROUND.
Keep the LAYERS, you never know if you would like to change some of the settings. This will make it easier to pick up the work again.
Final image
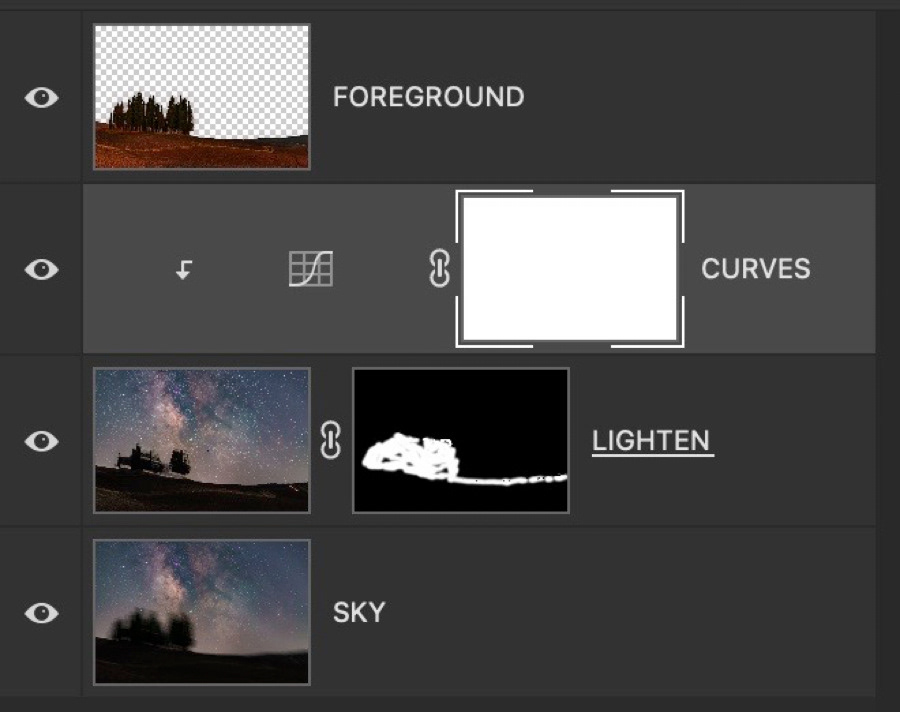
Opened the SKY, LIGHTEN and FOREGROUND in Photoshop layers. Where “SKY” becomes your bottom layer, LIGHTEN the second layer and set a mask over it to make it invisible.
Selected the FOREGROUND and did a selection for the sky and masked it (here the mask is already deleted, it’s better to keep it) so only the landscape-foreground is visible above the layers underneath, LIGHTEN and SKY
Solution for the hidden sky parts
And now comes the magic by painting back the LIGHTEN-layer around the trees with a white brush on the previously added black mask (visible like white painting on the mask).
The smearing elements disappeared !!!
Some corrections must be made to hide planes or satellites but this is rather a minor job compared to what would have been the challenge to fill the missing parts…
Any problem with a slight luminosity differences of the LIGHTEN-layer can be fixed with curves.
Final image
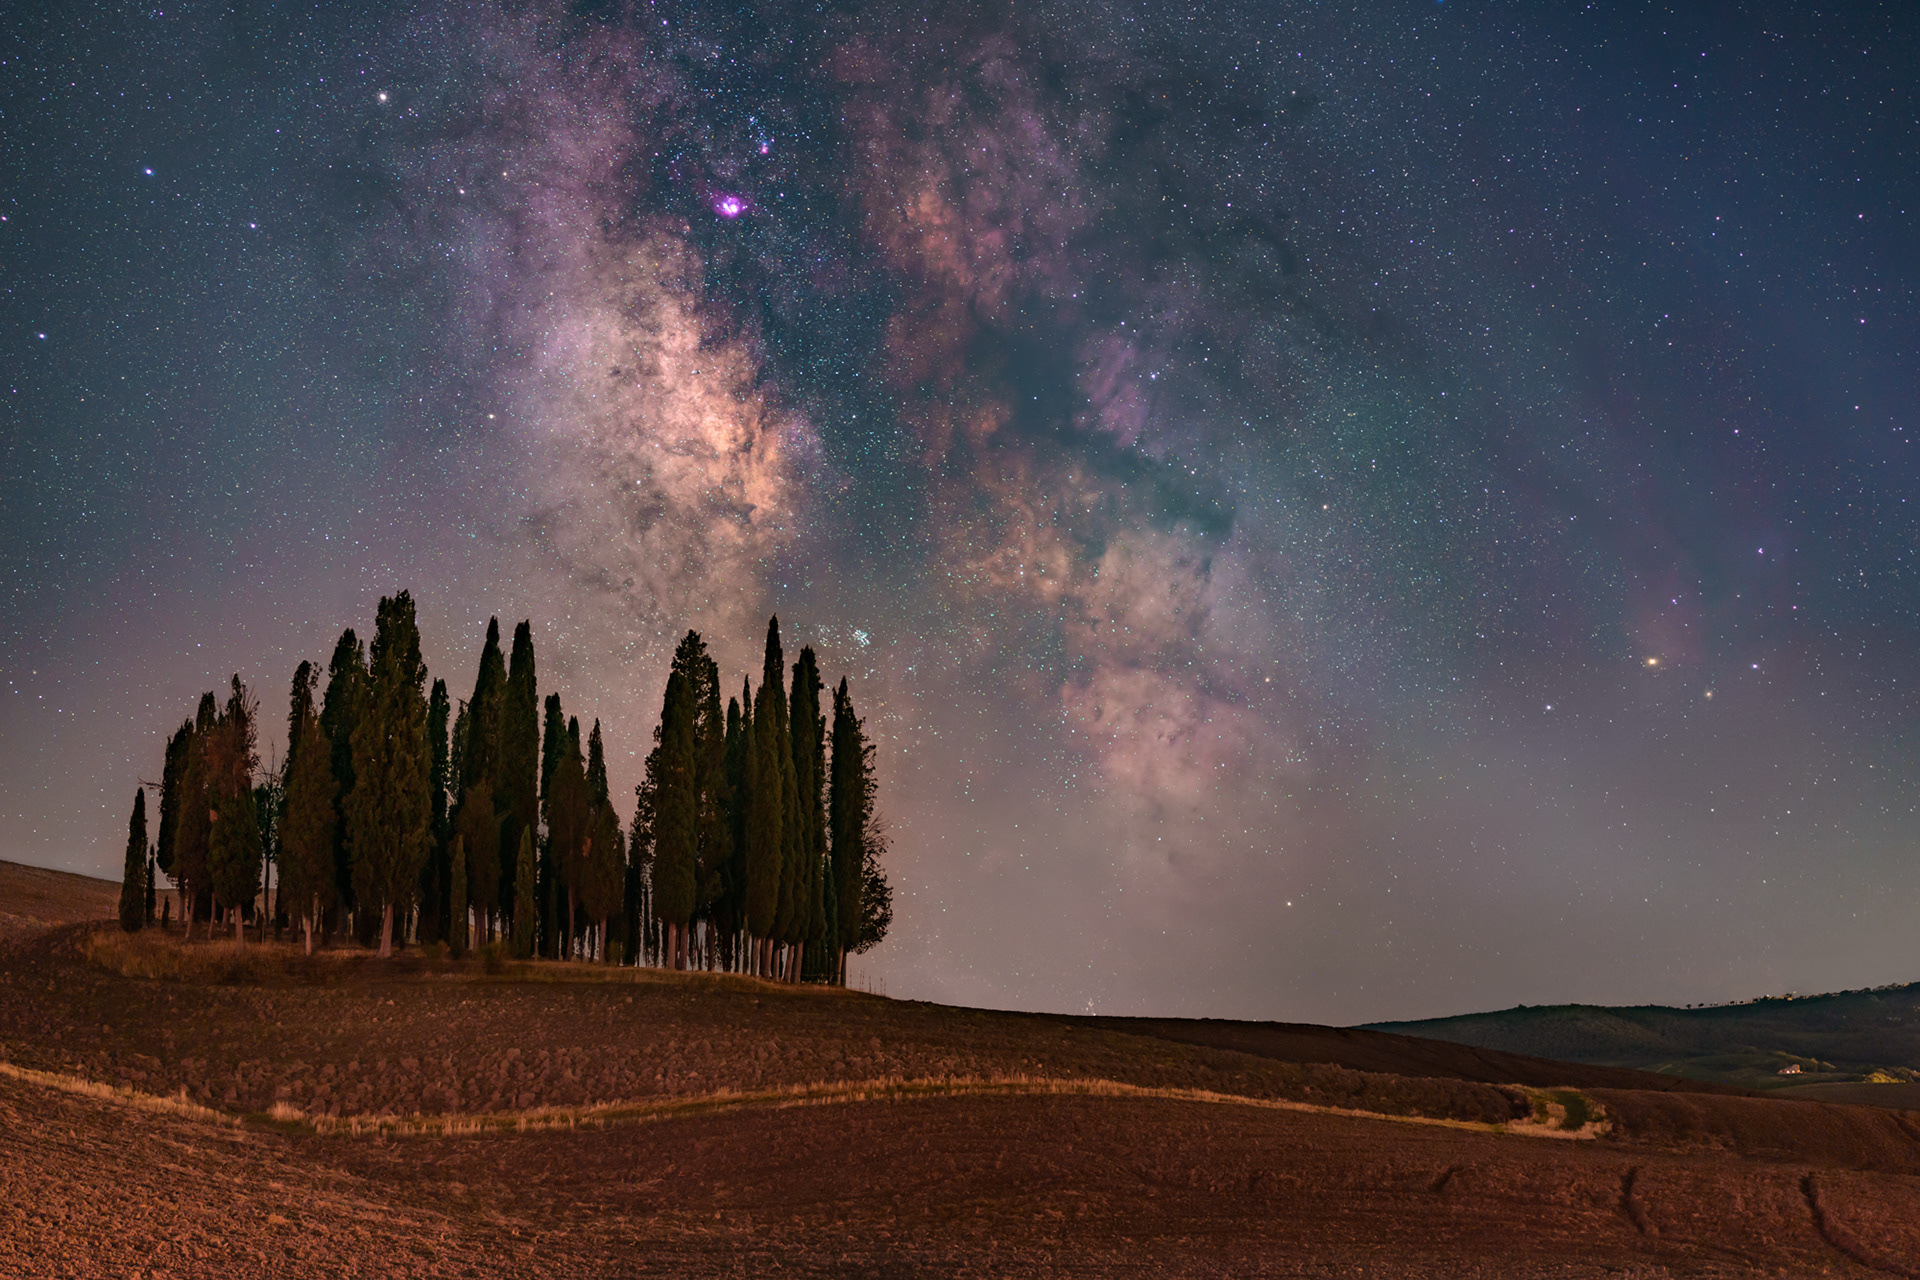
Would have preferred less light pollution near the horizon. Had to do some tweaks to make it less visible but there is no other option. Had a “light pollution filter” installed but didn’t take all the light pollution away.
Darkened a little bit the foreground to have a better balance with sky but happy since the trees didn’t turn into black silhouette.
Some final thoughts
An even better approach regarding the photography part could be: first tak half of the sky tracked images, take the foreground picture(s) and take the other half of the sky pictures.
I think a high number of sky pictures favorites the final result (to get back the sky out of the smearing effects)
Actually 30 sec exposure is maybe an easy way to follow because you don’t need an external intervalometer and the built in intervalometer perform with ease till 30 sec (Sony doesn’t allow to make longer exposures). And the dynamic range is not to much compromised.
A problem with this approach will be for illuminated objects pointing into the sky. Also they will remain visible in the LIGHTEN image. Will be needed to make them darker than the sky.